Improve Your Harp Technique
A guide to improving your harp technique
Keen to make your harp playing shine? Focus on mastering technique first and foremost. Great technique is the building block of any remarkable harpist. Imagine playing like a pro with ease and finesse. Our ‘Beginner’s Guide To Learning The Harp’ unveils secrets to enhance your skills swiftly and simply. Dive into the world of harmonious strings and transform your musical journey. Get ready to discover the magic of the harp—your ticket to musical mastery awaits!

Daily Exercises
Beginning a practice session with exercises is a must. However eager you feel to get going with playing your favourite piece or getting your teeth into learning something new, your body will thank you for the warm-up – honestly!
Compare yourself to a professional tennis player. Andy Murray would never start a match before ensuring his body is ready to take on the strains of a tennis game – neither should your fingers, wrists and arms!
Many exercises are essential to gain a proper technique. Once you master these exercises, you’ll be able to play almost anything. That sounds like a grand statement – but don’t underestimate the word ‘master’!
If you work enough, you’ll be able to look at a section of music and be confident enough to learn it quickly. For each exercise, there is a specific way to practice it. Your practice is only as good as your form while you practice. So be disciplined about it, as practising exercises wrong is a complete waste of time!
Don’t panic! They don’t have to be boring exercises – there’s an endless list of things we can play to improve our technique! Here are some examples…

1. Scales
Scales on the harp are probably one of the easiest things to play. Enjoy them!
Major scales in particular – once the levers or pedals are set in the correct position, you play every scale in exactly the same way!
Melodic minor scales are a little more work because you have to change one lever or pedal on your way down.
By knowing your scales well, your muscle memory will instinctively know what scale is part of what melody, bassline or harmony – and you’ll be able to play it easier and more accurately knowing this.
Tip: Try varying the rhythm in order to strengthen each finger individually and enable the fingers to play faster, eventually.

Have you ever seen someone sight-read a complicated piece and wondered ‘how did they do that?’ The answer is patterns. When reading music, we end up reading a series of patterns, not each individual note. It’s exactly the same reading this paragraph. Did you realise I swapped the G and A around in the middle of the word ‘paragraph’? Thought not!
Music is simply, another language.
2. Both hands together
Another blessing to embrace – when you do play a scale with both hands together, they use exactly the same fingering. Both hands begin on the 4th finger, reach the top of the scale on the thumb and end the scale on the 4th finger again. Well…that’s the aim. If this doesn’t happen then retrace your steps as something may have gone wrong in the middle!
And by the way, you don’t have to play chromatic scales on the harp because they’re utterly impossible – your feet would be working harder, changing pedals, than any other part of your body!
3. Arpeggios

The second most common tool in compositions is arpeggiated figures. Look at any melody; you’ll see either a mini-scale or a mini-arpeggio. Just like scales, if you know your arpeggios well, you’ll already know all these little snippets before you even practice the piece!
Arpeggios also strengthen your wrist. The transition from the thumb to the 3rd finger forces you to turn and direct your wrist, making it more flexible
4. Chords
Once you have mastered playing all 4 fingers, in both hands, individually, your aim now is to ensure i) an even tone between all fingers, ii) a rounded and resonant sound.
Blocked Chords
The majority of music is made up of chords. They are all over the place, and being able to play chords quickly is a tremendous advantage to learning pieces faster and more efficiently. Once you know all the chords, your fingers will be ready to “jump” to the chord shapes without thinking about it.
Broken Chords
Broken chords are often found in various left-hand (bass) patterns. Practising broken chords develops the necessary ‘under wrist’ motion that is used in so many harp pieces.
General Harp Technique

Wrong technique makes playing more challenging and tiring. Incorrect seat positioning or posture can cause pain in the legs, shoulders and back. Awkward hand positions can give you stiff fingers and limit your dexterity.
Fixing a bad technique can be tricky, so it’s essential to acquire good habits from the start.
The Harp Stool
It’s essential that you have a decent stool on which you can sit.
Swivel chairs are a big ‘no’ due to the fact that you can spin to the side whilst playing. As is a sofa or armchair; not only is the seat part too soft and doesn’t provide support, you have two arms to contend with!
It’s important that you are comfortable and at the right height.
The best choice is an adjustable stool designed for playing the harp or the piano – even better is a slightly firmer stool; we don’t need too much padding!
Sit at a height where you can reach both top and bottom section of strings and be sure to keep an eye on your hips – your hips should never be lower than your knees.
Posture
You may not know this, but your entire body is involved in playing the harp.
Introduce your mind to your sitting bones. Have you met them before? No, neither had I until I was about 20! If you sit on your sitting bones on your hands, you will soon learn why some padding is good! Once you’re safely sat on your sitting bones let the body be. Think about each part of your body – try not to pull your body up towards the harp, or pull your legs down towards the floor; they’re not going anywhere.
Relax your shoulders. Fight the urge to hunch or curve your spine. If you hold tension in your shoulders as many people do, roll them over and back a few times.
Once you’re happy with how you’re sat, put your hands on the strings. Don’t think you need to grip the string with your fingers. Imagine your fingers had weights in the pad and you’re letting gravity take over. Once you’ve plucked a string, keep the other fingers on the strings but b sure to relax your hand and fingers.
As you move up and down the harp with your fingers, lead with your elbow. Imagine a pencil is taped to your elbow and you’re drawing a light sketch on the wall beside you. Also, try turning your face towards the right arm that’s working its way up the harp – then you’re sure of relaxing those neck muscles.
Hand Position
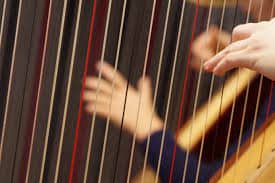
Generally, fingers 2,3,4 and the little finger should be pointing down towards the soundboard and your thumb should point towards the sky. Your wrist should be lower than your knuckles and your elbow slightly higher than your wrist. The easy way to remember this is down, up, down, up!
Fingers Thumb Wrist Elbow
Down Up Down Up
Don’t think you have to stick to this position rigidly. There will be times when the elbow needs to come down a little or the thumb needs to be slightly lower on the strings, but start with these positionings.
Due to the fact that the little finger is physically redundant whilst playing the harp, it’s still attached to the other finger so the tendency is for it to get a little stiff. Sometimes, shift your focus to your little finger to see how it’s feeling. Try keeping is relaxed and generally pointing towards the floor.
Bonus Tips...
Sight Reading
If you can, you should try and sight-read every time you practice.
When sight-reading, it’s advised that you read something just under your current playing level. This way, it’s a challenge, but not too much of a challenge…
Just don’t fall into the trap of reading something that’s too easy – your sight-reading won’t improve if everything is a walk in the park!
And I know this sounds obvious, but remember; for it to be sight-reading; it needs to be a piece of music you have never seen or practised before.
Fingering
Most people underestimate the importance of fingering.
Fingering is what allows you to play as fast as you need. Your brain learns through creating neurons. The more times you repeat an action – precisely the same action – the more ‘hard-wired’ that neuron becomes, and the more your body and brain can do something on ‘auto-pilot’.
The key here is PRECISELY the same. If you don’t know your fingerings, each time you come to play something, you’ll choose a random array of what finger plays what. This is not building a strong neuron – it’s building unpredictability.
Play through passages slowly and note on the sheet music the best fingering that feels comfortable. This, of course, goes back to your scales and arpeggios!
You’ll soon find you are naturally creating sensible fingering, that if you practice without leaving it to chance, you’ll be successfully flying around the harp in no time.
Improve Your Harp Technique - Summary
Most things in life work well when you take the time to plan them. Playing the harp, and improving your technique, is no different. Challenge yourself on a daily basis – and remember that building a strong technique is the foundation of your playing. The time taken here will make your life easier down the road…
About the Author
Uncover These Thrilling Things
As regular as I want to be Elton John for a day, I send out an email to you with the four most amazing things that you absolutely have to know about.
As long as it’s music associated, it could end up in the e-mail. Innovative songs, tips, products, product reviews – anything at all.
But you’ll only obtain a copy of the email if you gain access directly below.
Read the next post in this series:


