Interested in learning piano and discovering how to place your hands on the keys? Wonder no more! Hand positioning and mastering the correct piano technique is an essential skill to pick up swiftly, ensuring the rest of your piano adventure runs seamlessly.
The video below was filmed by Pianist & Conductor, Robert Emery, at Abbey Road Studios, and features a 9ft Steinway Concert Grand Piano. It will help improve your piano hand position, and get you playing the piano like a pro!

If you have bad habits, everything from your neck, wrist, arms, shoulders and even your thumbs can hurt! Your posture will suffer giving you a bad back. You’ll get grumpy and eventually quit learning piano altogether.
So pay attention (!) and learn the ideal hand positions for playing piano.
Where to Put Your Hands on THE Piano
There are 88 notes on a piano, but there are only twelve actually to learn!
Let’s break the piano down into more understandable sections. First, if you look closely at the keyboard, you’ll see a pattern; the twelve keys repeat themselves in the same configuration up and down the instrument. We call this sequence of twelve keys an ‘Octave’. Learning to identify this octave pattern is crucial for finding your way around the keyboard.
To help you find your starting point, look at the black keys. You will notice an alternating pattern: groups of two and three black keys.
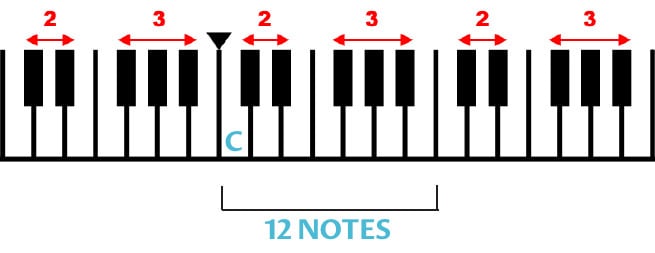
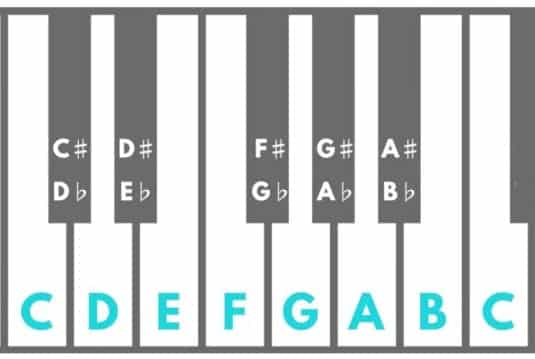
The keys are named after letters of the alphabet. For example, every white key immediately to the left of two black keys is a C. Find the middle of the keyboard, and the C to the left of the group of two black keys. This is what we call middle C.
This position will be your starting point for playing your first few tunes. Ignore the black keys for now; we will come to them later…
Right Hand
Put your right thumb on middle C. Now put the rest of your fingers on the keys up from middle C, assigning one finger to each of the following four white keys. These are D, E, F, and G.
So, you’re now wondering why we start learning on a C and not at the beginning of the alphabet on an A… The simple reason is that many songs for beginners can be played easily in the C position with only white keys.
Left Hand
The two notes below C, heading down the piano, are A and B. Since there are only seven different white keys, we only use the first seven letters in the alphabet: A to G. In other words, the white key that comes after G is an A. The whole sequence then starts again. This means going down from your thumb which is also on middle C, we have B, A, G and then F on your little finger.
Get to know the keys
Make sure to get comfortable knowing which key is which letter of the alphabet! Practice playing C to G and back again, pressing only one note down at a time, and keeping all the other fingers as still as possible. It sounds easy. It’s not…
hand position
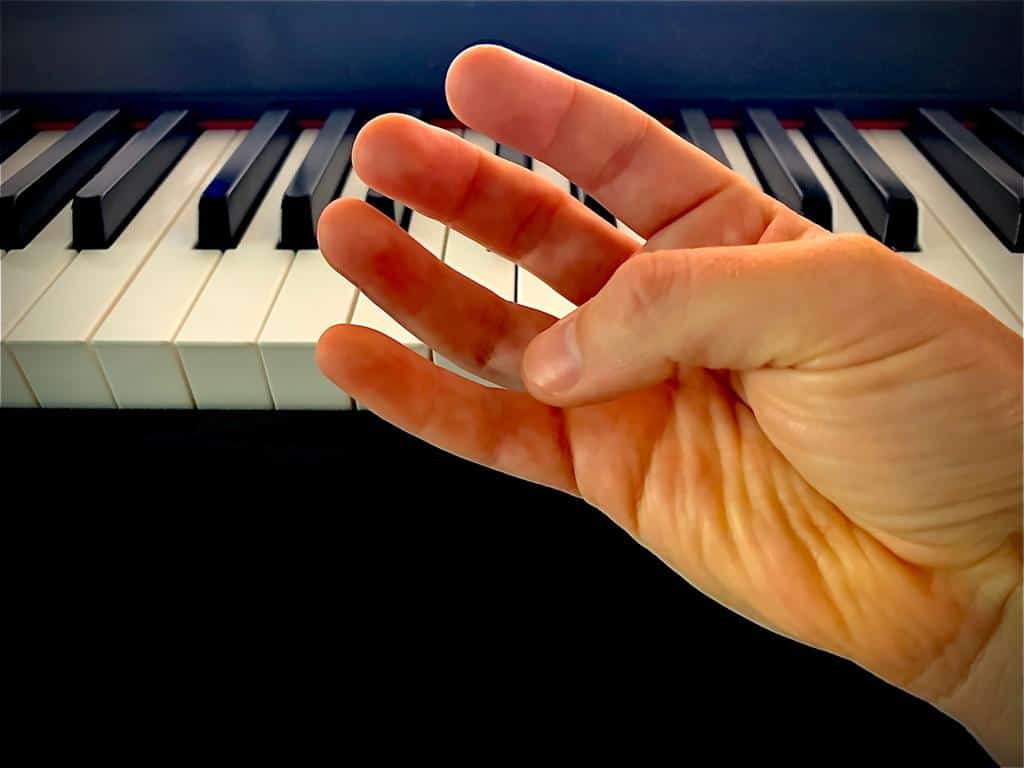
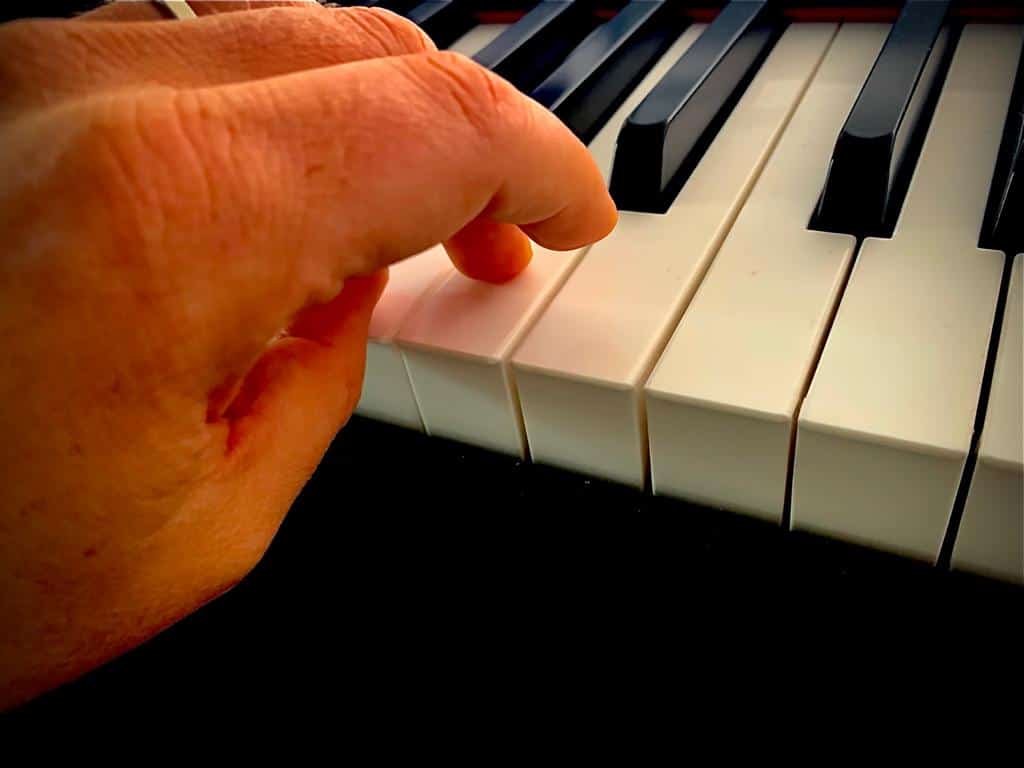
Getting your piano technique correct is vital. Imagine you’re holding a small ball or orange (or any other small fruit for that matter!) in each hand. Curl your fingers so that your fingertips tap on the keys. It would be great if you only touched the keys with the tips of your fingers, or sometimes the ‘pads’ – but never more than that. If you have your straight finger touching the key, you’ll get into difficulty!
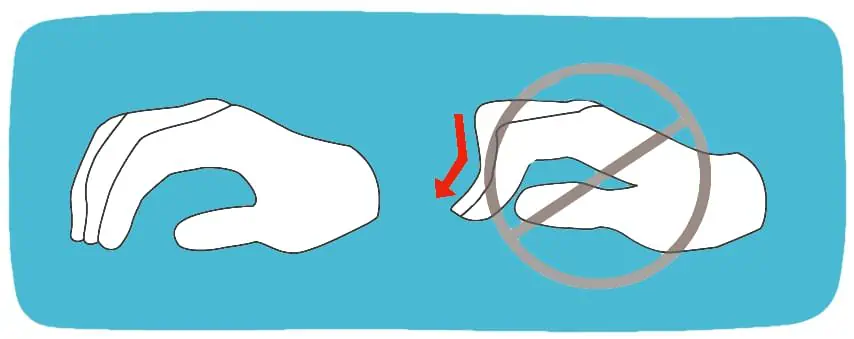
Your little finger (also known as your “pinky” finger) is the smallest and weakest, so it is common to keep it flat. Try not to let that happen. Instead, curve it like the others. Complicated, I know – but you’ll get the hang of it soon.
Your thumb is the exception to the curving rule. Keep your thumb straight but relaxed, letting it drop down on the key with the side edge.
When you play, your fingers need to remain round and firm. It’s widespread for beginners to let their fingers collapse at the first joint. This will make you play slower and make more mistakes – so try to fix this asap!

What is piano fingering?
We have 88 notes on a piano but only ten fingers to play with. Piano fingering dictates to us what fingers play what notes when.
When learning the piano, we rely upon naming each finger a number to give instructions accurately. Your thumbs on both hands are number one, and the count outwards to your little pinky finger, which is finger number five.
If you see any numbers above or below notes, those numbers will correlate with what finger you should use.
This system is called the ‘English notation system’. It is the standard used today across most of the world. However, you will always find some countries and people using a different system.
The next most common system is called the ‘Fixed Do system’. You’ll have heard it from the song ‘Do Re Mi’ from ‘The Sound of Music’. Instead of C, D, E, F, G, A, B, this notation uses Do, Re, Mi, Fa, Sol, La, Si.
scales
Now that you know the finger numbers and the names of the notes, you can apply your learning to play a C major scale, the backbone of any piano technique. The C major scale consists of eight notes from C to C. Now, as you only have five fingers on each hand, this means you’ll need to do a special thumb ‘tuck’ movement to be able to play all eight notes smoothly.
The fingering pattern in the right hand is 1, 2, 3, (TUCK) 1, 2, 3, 4, 5. A thumb tuck involves curling your thumb under your hand, so it tries to reach finger number five. Although it may seem simple, the thumb tuck is an essential skill a pianist needs to learn, so don’t skip over this bit!
When practicing scales in the left hand, all the same rules apply, except our hands are mirrored. This means the fingering pattern is 5, 4, 3, 2, 1, (OVER) 3, 2,a 1.
This time, instead of a TUCK, we do an OVER. This is where the thumb tucks under the hand, exactly like you’ve already learnt, but the third finger moves your hand up to play the A note.
Are scales really that important?
Scales are those things that all pianists love to hate. Possibly because scales are the one thing that can make or break your piano technique, almost every melody is made up in parts from a scale. Nearly every bass line follows a scale at some point. Almost every harmonic progression is built around scales. So you may not realise it, but listening to music means listening to many different scales. That means playing music means playing many different scales. It is that important.
If you know your scales, your muscle memory will instinctively know what scale is part of what melody, bassline or harmony – and you’ll be able to play it easier and more accurately knowing this. Plus your piano technique will improve!
Have you ever seen someone sight read a complicated piece and wondered, ‘how did they do that?’ The answer is patterns. When reading music, we end up reading a series of patterns, not each note. It’s precisely the same reading this paragraph. Did you realize I swapped the G and A around in the middle of the word ‘paragraph’? Thought not!
How important is using the correct fingering?
Most people underestimate the importance of fingering.
Fingering is what allows you to play as fast as you need. Your brain learns through creating neurons. The more times you repeat an action – precisely the same action – the more ‘hard-wired’ that neuron becomes, and the more your body and brain can do something on autopilot.
The key here is PRECISELY the same. If you don’t know your fingerings, each time you come to play something, you’ll choose a random array of what finger plays what. This is not building a solid neuron – it’s building unpredictability.
You’ll soon find you are naturally creating sensible fingering, that if you practice without leaving it to chance, you’ll be successfully flying around the keyboard in no time.
Some important technical tips:
- Make sure your piano bench is set at the correct height. Check out this article to find out what that should be.
- Curved fingers are the key to success.
- Your fifth finger (pinky) is the weakest – so work extra hard on it
- Your middle finger is the longest, so can easily get in the way. However, it’s also the strongest.
- Remember your brain is like a sponge – it remembers everything, including mistakes. So if you play the same scale using different fingerings on all the keys, it’ll confuse your brain. You’ll remember all the different options, instead of the proper fingering you should have used!
- A good posture overall will help you get the correct hand position.
How to place hands on piano
Summary
How you place your hands on the piano a make or break your playing. Start correctly, and your journey to being a super pianist will be much more successful! Of course, it’s much easier to find a great piano teacher to help!
Good luck – and if you want more advice, feel free to ask questions below in the comment box. Now go get comfortable on that piano bench!
FAQ's
Place all your fingers on the piano keys, with both thumbs on middle C. Curve each finger slightly. You’ll be on your way having the correct position and being able to play piano like a pro! And get a good piano teacher to help…
You need to have the ‘pads’ of your fingers on the piano keys. Don’t over curl them so the edge of your nail is touching – it should just be the tip of your finer. Your middle fingers and your ring finger will need a bit of extra work. And be careful your index finger also is curled just enough.
Practice, practice, practice. Although remember, your brain absorbs everything, so if you practice with a bad technique, you’ll be ingraining that bad technique into your brain. So be careful.
Nothing about piano playing is easy. From your right hand thumb position through to making sure you use the same fingers time and time again when playing scales – it all matters. To play the piano well, just start playing – relax, have a proper posture, and concentrate on exercises to build up a bit of muscle memory. You’ll then be playing your tunes in no time!
A standard piano has 88 keys, with 52 white keys and 36 black keys. The keys are arranged in a repeating pattern of groups of two and three, with the white keys representing the natural notes and the black keys representing the sharps and flats.
To learn piano by yourself, start by familiarizing yourself with the basics of music theory and piano technique through online resources such as tutorials and instructional videos. Practice regularly and gradually increase the difficulty of the pieces you play to improve your skills and develop your own playing style.






noticed the bit about piano fingering and couldn’t help but wonder how much of this is really just traditional vs what’s practically useful. i mean, we’ve all seen those self-taught prodigies on youtube who don’t follow conventional rules and yet, they play amazingly well. think the emphasis on strict fingering might be overdone? not saying it isn’t useful at all, but maybe there’s room for a bit more flexibility than what’s traditionally taught. Robert Emery’s insights are valuable, but real-world application can sometimes differ, right?
Good luck Trev!!!
Just read through the section about hand positioning on the piano, and I have to say, it’s quite enlightening! I’ve always struggled with where exactly my fingers should go, especially when trying to reach those wider chords. The clear breakdown between the right and left hand roles really helps. Robert Emery did a great job explaining it in a way that’s both easy to understand and apply. Wondering if there are any exercises I can follow to improve my hand flexibility and reach?
We have more exercised on Ted’s List. Just search for them Liz…
MiaSongbird, that sounds like a fantastic idea! I haven’t, but I’ll definitely give it a try. Anything to make those stretches a bit easier. Thanks for the tip!
Hey Liz, stumbled upon some hand stretching exercises online that might help, like spreading your fingers wide on the keyboard for a few minutes every day. Have you tried those yet?
My hands are finally on the piano!
Brilliant William. Now just move those fingers…